“`html
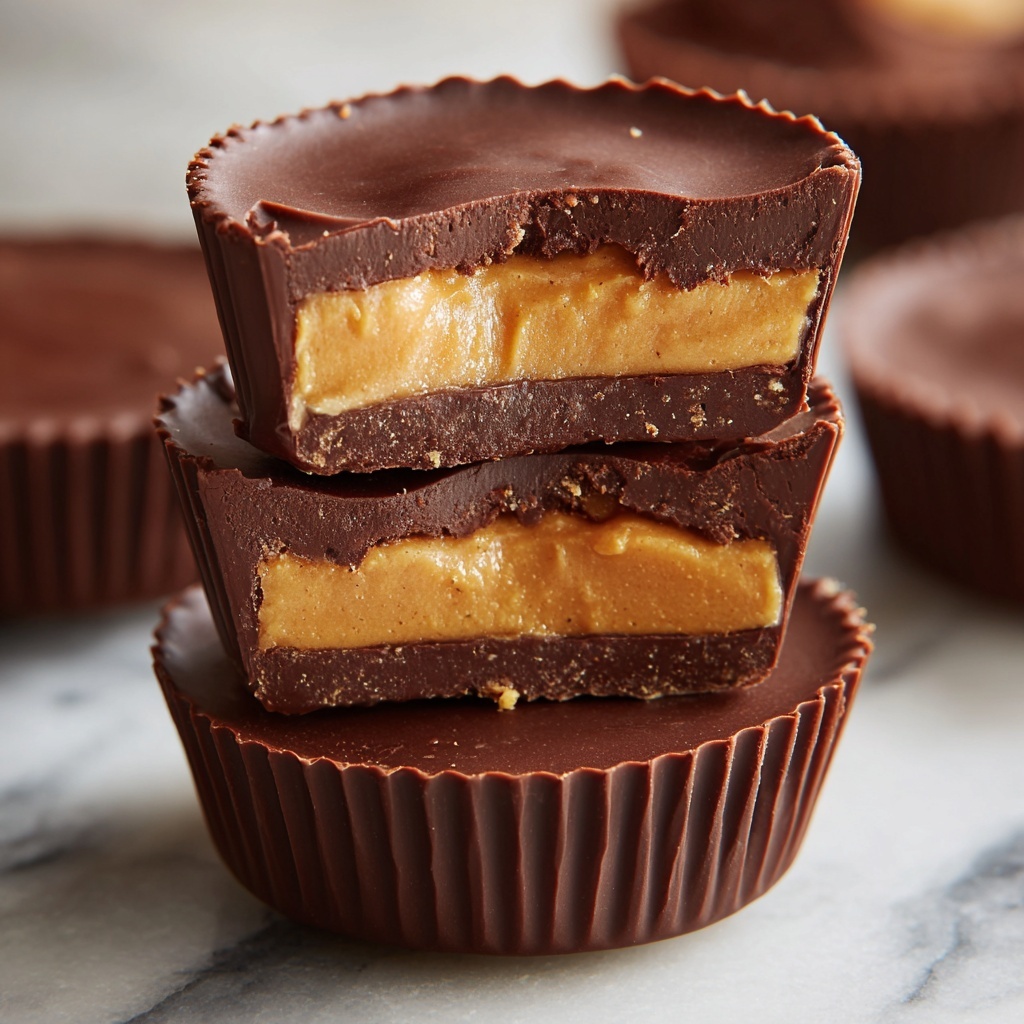
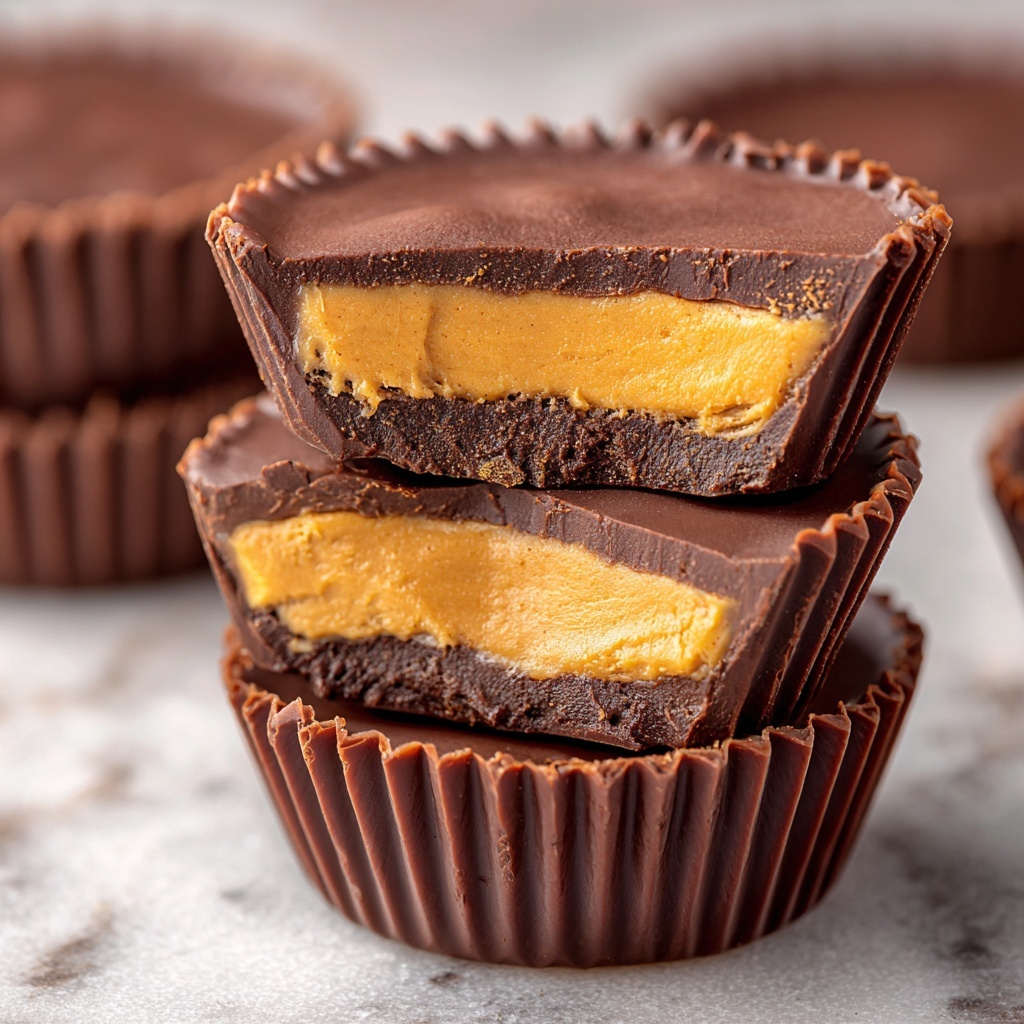
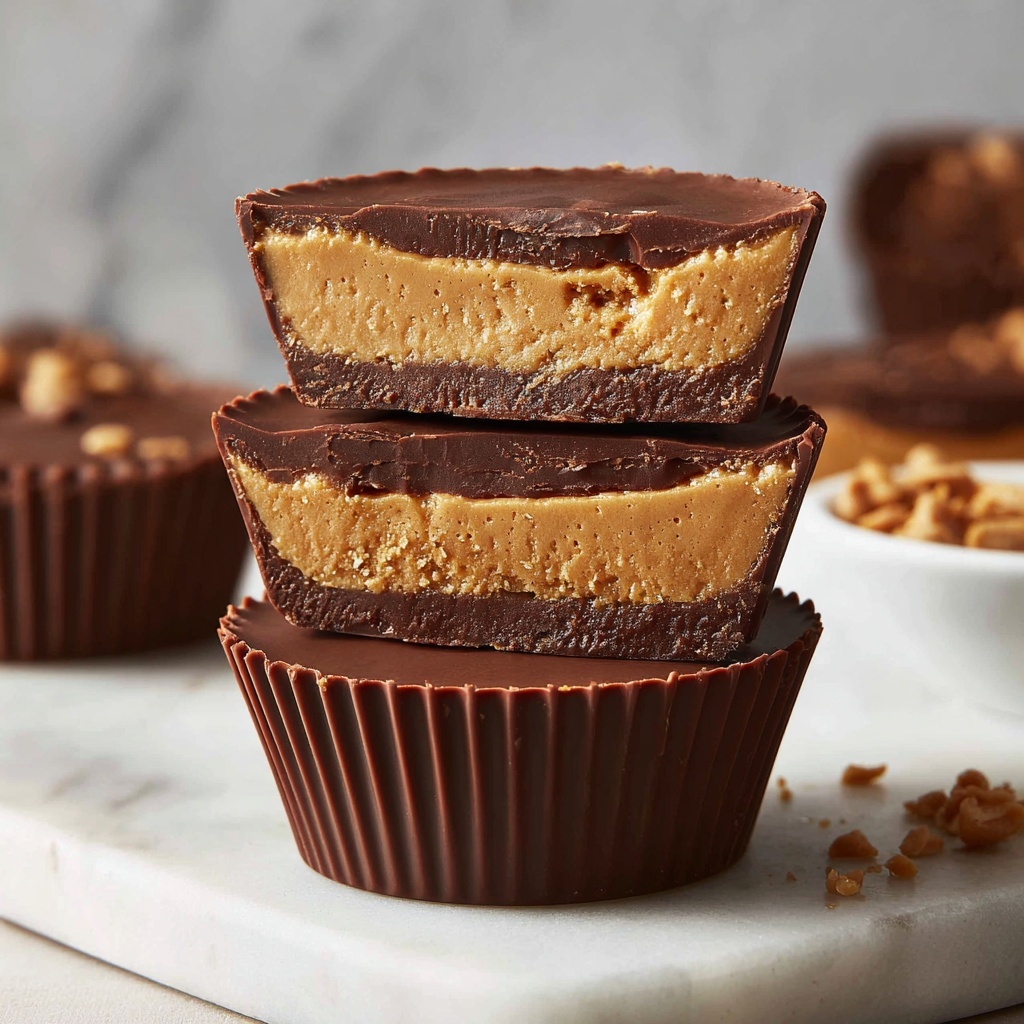
If you’ve ever dreamed of a snack that perfectly blends indulgence with a healthful boost, this Protein Peanut Butter Cups Recipe is your new best friend. Imagine rich, velvety dark chocolate giving way to a creamy, protein-packed peanut butter center that satisfies your sweet tooth while fueling your day. Each bite offers a harmonious balance of texture and flavor, making these cups a guilt-free treat you’ll want to make again and again.
Ingredients You’ll Need
Getting started with these Protein Peanut Butter Cups is delightfully simple because the ingredients are straightforward but powerful. Each one plays an important role in crafting the perfect combination of texture, taste, and nutrition that makes these cups so irresistible.
- Dark chocolate chips: Provides a smooth, rich coating that melts in your mouth and offers antioxidants.
- Coconut oil: Helps melt the chocolate smoothly and solidifies the cups with a glossy finish.
- Natural peanut butter: Brings creamy, nutty goodness and healthy fats to the filling.
- Protein powder (vanilla or chocolate): Adds a punch of protein to keep you full and supports muscle recovery.
- Maple syrup: Sweetens the filling naturally without overpowering the peanut butter’s flavor.
- Sea salt: A light sprinkle on top balances the sweetness and enhances the chocolate’s depth.
How to Make Protein Peanut Butter Cups Recipe
Step 1: Melt the Chocolate
Begin by gently melting the dark chocolate chips together with the coconut oil. The coconut oil lends a silky texture that makes the chocolate pourable, which is key for creating that perfect base and top layer. You want the mixture to be completely smooth without any lumps, so take your time and stir continuously.
Step 2: Prepare the Cup Bases
Line a muffin tin with paper liners to make removing the peanut butter cups a breeze. Spoon the melted chocolate into each liner, covering the bottom in a thin, even layer. This will become the sturdy chocolate base that supports all the delicious filling to come.
Step 3: Freeze to Set
Pop the muffin tin into the freezer for a few minutes until the chocolate hardens. This firm base ensures the filling sits perfectly on top without mixing into the chocolate layer, giving you that classic, distinct peanut butter cup texture.
Step 4: Mix the Filling
While the base is setting, mix together the natural peanut butter, protein powder, and maple syrup until you get a creamy, smooth filling. This mixture is where the protein-packed magic happens — it’s rich, flavorful, and just sweet enough to complement the dark chocolate.
Step 5: Assemble the Cups
Spoon a generous dollop of the peanut butter filling onto each chilled chocolate base, smoothing it gently. Then, carefully spoon the remaining melted chocolate over the filling, making sure it’s fully covered. This top layer seals in the creamy filling and creates that luscious chocolate shell you expect from a peanut butter cup.
Step 6: Final Freeze and Salt Sprinkle
Before placing the cups back in the freezer, sprinkle a pinch of sea salt on top of each one. The salt enhances every flavor, balancing sweetness and deepening the chocolate’s richness. Freeze the assembled cups until they’re fully firm and ready to enjoy.
How to Serve Protein Peanut Butter Cups Recipe
Garnishes
Adding a delicate garnish can elevate your homemade peanut butter cups beautifully. Try a tiny twist of orange zest for a citrus pop or a few crushed roasted peanuts sprinkled lightly on top to add crunch and visual interest.
Side Dishes
Protein Peanut Butter Cups are fantastic on their own, but they also pair wonderfully with fresh berries or a small bowl of Greek yogurt for a balanced snack or mini dessert that feels both indulgent and nourishing.
Creative Ways to Present
For an eye-catching treat, arrange the cups on a decorative plate lined with parchment paper and drizzle a bit of melted white chocolate over the tops. You could also pop a small paper flag or festive toothpick into each cup for party-ready charm that will wow your guests.
Make Ahead and Storage
Storing Leftovers
Once you’ve made these Protein Peanut Butter Cups, store any leftovers in an airtight container in the refrigerator. They’ll keep beautifully for up to a week, maintaining that perfect balance between firm chocolate and creamy filling.
Freezing
If you want to keep your peanut butter cups fresh for even longer, freeze them in a single layer on a baking sheet, then transfer to a freezer-safe container or bag. They store well for up to 3 months, making them a perfect make-ahead snack whenever a craving hits.
Reheating
To enjoy your frozen peanut butter cups, simply let them thaw in the refrigerator for about 15 to 20 minutes before serving. Avoid microwaving as it can change the texture, making the chocolate grainy or the filling too soft.
FAQs
Can I use other nut butters instead of peanut butter?
Yes, almond butter or cashew butter can be excellent substitutes and add a slightly different flavor profile, but keep in mind the texture may vary slightly depending on the creaminess of the nut butter.
What type of protein powder works best?
Vanilla or chocolate-flavored whey or plant-based protein powders work wonderfully. Choose one you enjoy the taste of because it impacts the overall flavor of the filling.
Is it possible to make these cups vegan?
Absolutely! Just opt for dairy-free dark chocolate chips and a plant-based protein powder. Make sure your maple syrup and peanut butter don’t contain any non-vegan additives.
How do I prevent the chocolate from melting too quickly?
Keep your peanut butter cups stored in the refrigerator or freezer until you’re ready to eat them. Room temperature can soften the chocolate quickly, especially if it’s warm where you live.
Can I add crunch to the filling?
Yes! Adding chopped nuts or even crispy quinoa can give you an exciting contrast in texture that complements the creamy, smooth filling beautifully.
Final Thoughts
If you’re looking for a sweet treat that doesn’t sacrifice nutrition, this Protein Peanut Butter Cups Recipe is a total game changer. It’s easy to whip up, deliciously satisfying, and perfect for anyone craving something indulgent yet good for you. Give it a try—you might just find your new favorite snack to whip up anytime!
“`
Print
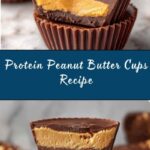
Protein Peanut Butter Cups Recipe
- Prep Time: 15 minutes
- Cook Time: 0 minutes
- Total Time: 55 minutes
- Yield: 12 servings
- Category: Snack
- Method: No-Cook
- Cuisine: American
- Diet: Low Lactose
Description
These Protein Peanut Butter Cups are a delicious and nutritious twist on the classic treat, combining rich dark chocolate with a creamy, protein-packed peanut butter filling. Perfect for a satisfying snack or post-workout boost, these cups are easy to make and freezer-set for convenience.
Ingredients
Chocolate Base
- 1 cup dark chocolate chips
- 1 tablespoon coconut oil
Peanut Butter Filling
- 1/2 cup natural peanut butter
- 1 scoop protein powder (vanilla or chocolate)
- 2 tablespoons maple syrup
Topping
- Sea salt, for sprinkling
Instructions
- Melt Chocolate: In a microwave-safe bowl or double boiler, gently melt the dark chocolate chips and coconut oil together until the mixture is smooth and fully combined, stirring occasionally to avoid burning.
- Prepare Muffin Tin: Line a standard 12-cup muffin tin with paper liners. Spoon a small amount of the melted chocolate into the bottom of each liner, spreading evenly to form the base layer.
- Freeze Base: Place the muffin tin in the freezer for about 10-15 minutes to let the chocolate base set firmly.
- Make Peanut Butter Filling: While the chocolate base is setting, mix the natural peanut butter, protein powder, and maple syrup in a small bowl until smooth and well combined.
- Add Filling: Once the chocolate base is firm, spoon the peanut butter mixture evenly over each chocolate base layer in the muffin tin.
- Top with Chocolate: Pour the remaining melted chocolate over the peanut butter filling in each cup, covering it completely.
- Sprinkle Sea Salt: Lightly sprinkle sea salt over the top of each cup to enhance flavor and add a subtle crunch.
- Freeze Until Firm: Return the muffin tin to the freezer and let the peanut butter cups freeze for at least 30 minutes or until solid.
- Enjoy: Remove the cups from the freezer, peel off the liners, and enjoy a protein-rich treat straight from the freezer. Store leftovers in an airtight container in the freezer.
Notes
- Use natural peanut butter with no added sugar or oils for a cleaner flavor.
- Protein powder choice (vanilla or chocolate) can adjust the sweetness and flavor profile of the filling.
- For a vegan option, ensure your protein powder and chocolate chips are vegan-friendly.
- These cups should be kept frozen until consumption as they soften quickly at room temperature.
- Experiment with different toppings such as crushed nuts or cacao nibs instead of sea salt.