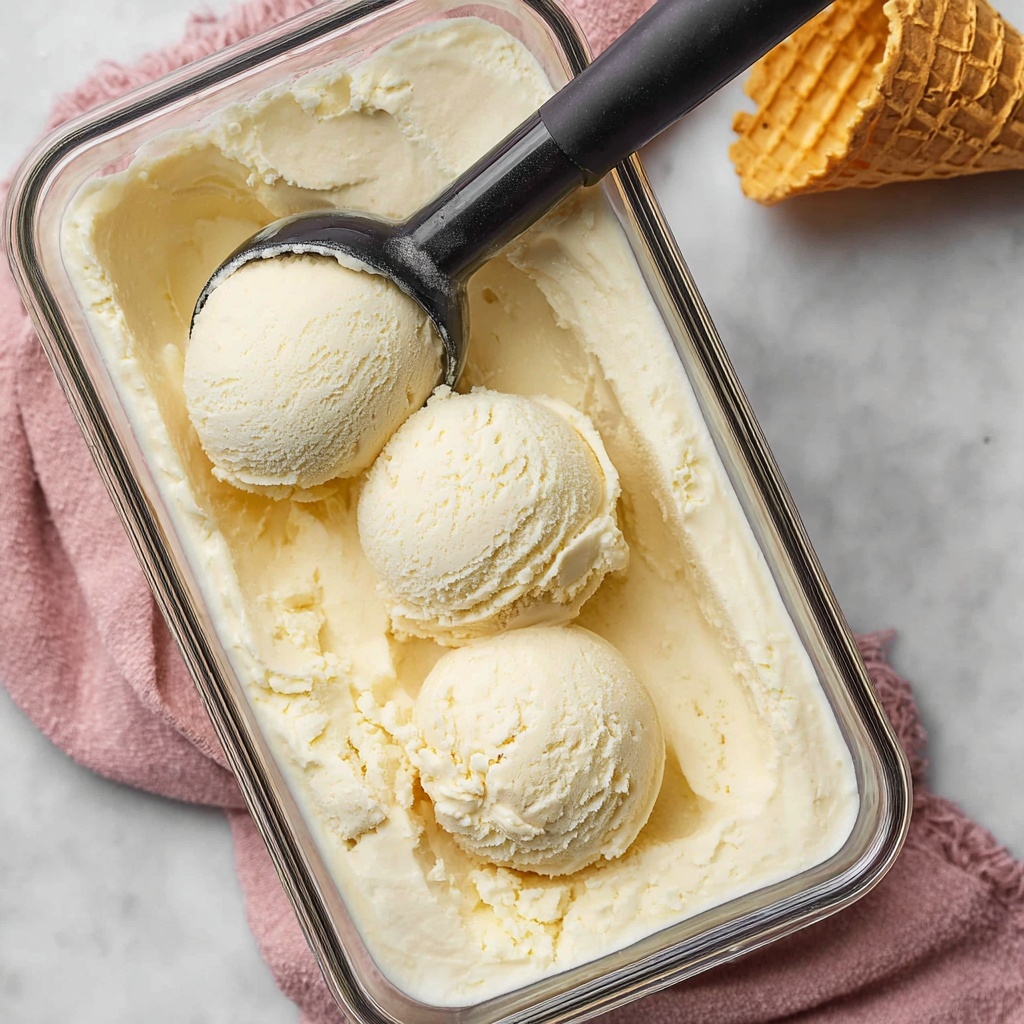
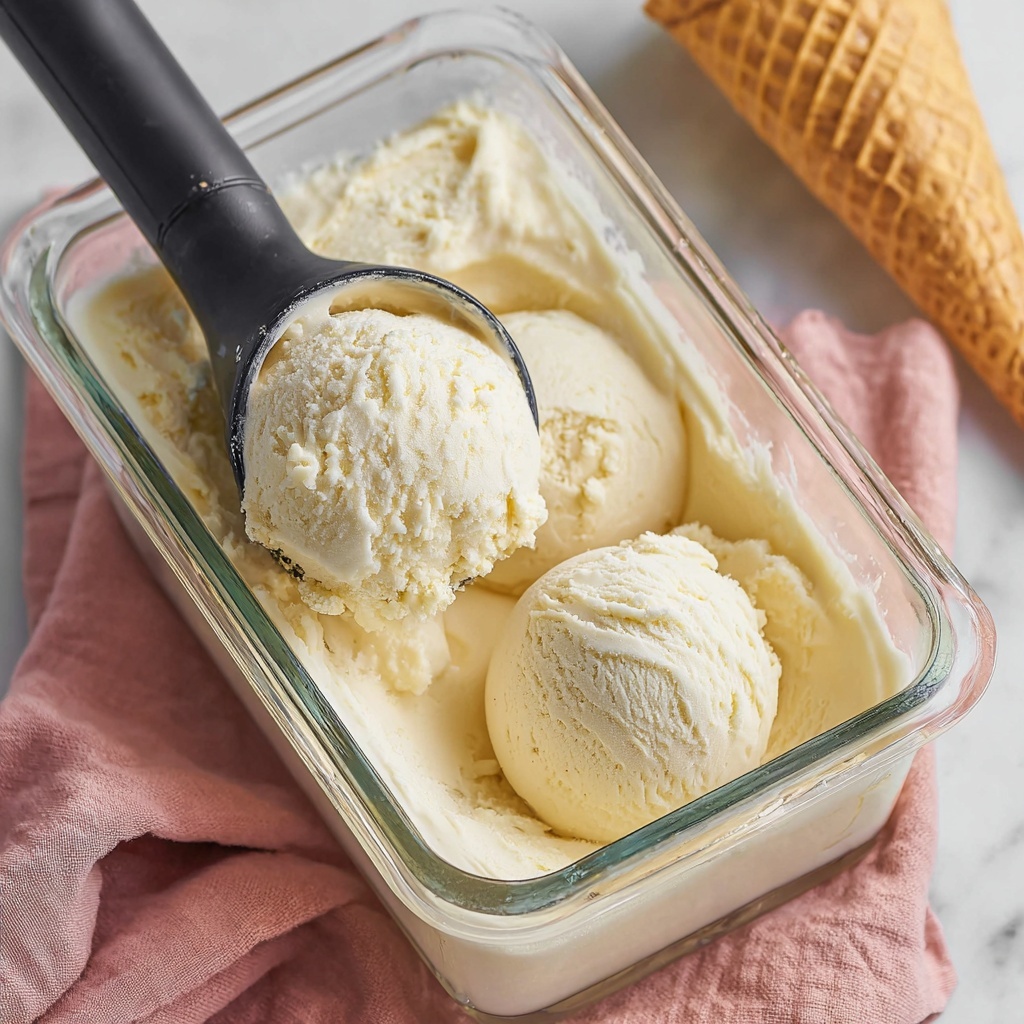
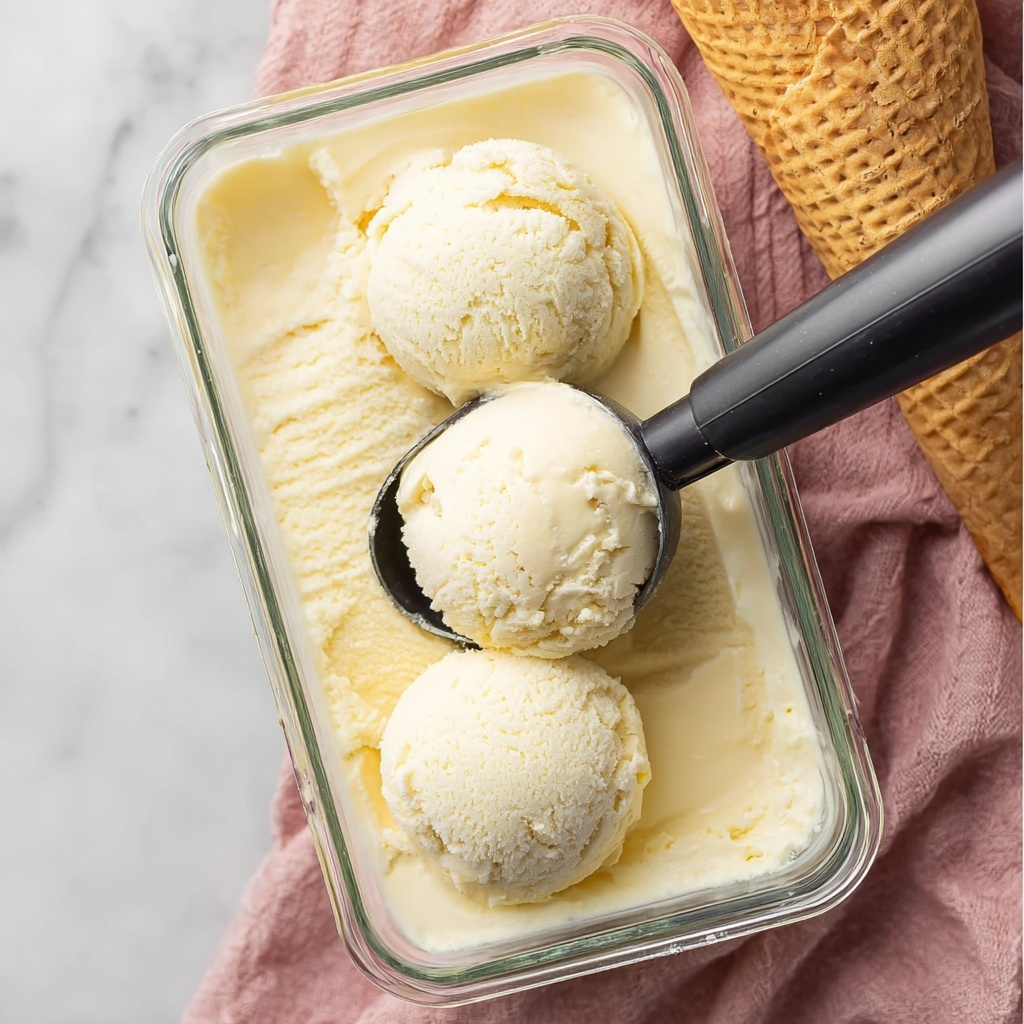
If you’ve ever dreamed of creamy, dreamy frozen delight that tastes like pure vanilla heaven, then this Homemade Vanilla Ice Cream Recipe is going to blow your mind. It captures the essence of a classic dessert with just a handful of simple ingredients, perfectly balanced to create that luscious texture and rich flavor you only get from making ice cream at home. Whether you’re new to the ice cream world or a seasoned scoop lover, this recipe is an absolute must-try to satisfy your sweet tooth with something fresh, smooth, and utterly irresistible.
Ingredients You’ll Need
The magic of this Homemade Vanilla Ice Cream Recipe starts with straightforward, quality ingredients that come together to create that silky, velvety texture and wonderful vanilla aroma. Each item plays a vital role, from the creaminess of heavy cream to the subtle sweetness of granulated sugar.
- 2 cups heavy cream: This provides the rich, creamy base essential for that luxurious mouthfeel.
- 1 cup whole milk: Adds a lighter, smooth texture while balancing fat content perfectly.
- ¾ cup granulated sugar: Sweetens the ice cream evenly, dissolving completely for a silky finish.
- 1 tablespoon pure vanilla extract: The star flavor that infuses the ice cream with timeless vanilla goodness.
- Pinch of salt: Enhances sweetness and deepens the overall flavor profile subtly.
How to Make Homemade Vanilla Ice Cream Recipe
Step 1: Mix Your Base Ingredients
Start by whisking the sugar, whole milk, and a pinch of salt in a large mixing bowl until the sugar spreads and dissolves completely. This step ensures your ice cream will be smooth without any graininess. Then, stir in the heavy cream and vanilla extract, which gives your dessert that unmistakable classic vanilla flavor. Cover this lovely mixture and let it chill in the refrigerator for at least 2 hours or, for the best results, overnight. This rest period helps the flavors marry beautifully and improves the cream’s texture.
Step 2: Churn the Ice Cream
Once the mixture is perfectly chilled, pour it into your ice cream maker. Follow your machine’s instructions—usually churning for 20 to 25 minutes. The mixture will transform into a soft-serve consistency during this time. Churning incorporates air to keep the ice cream light while also smoothing it out. If you want to mix things up, add chocolate chips, fruit bits, or cookie pieces during the last five minutes of churning for delightful surprises throughout your creation.
Step 3: Freeze Until Firm
Transfer the soft ice cream to an airtight container and pop it into the freezer for 2-4 hours. This important stage lets the ice cream set to a perfect scoopable firmness. The wait is always worth it when you’re about to enjoy your own Homemade Vanilla Ice Cream Recipe made from scratch.
How to Serve Homemade Vanilla Ice Cream Recipe
Garnishes
Keep it classic or add flair with fresh berries, a drizzle of warm caramel or chocolate sauce, or a sprinkle of toasted nuts. These simple touches not only enhance flavor but bring eye-catching color and texture to every serving.
Side Dishes
A scoop of this homemade vanilla ice cream pairs beautifully with warm desserts like apple pie, brownies, or even a slice of rich chocolate cake. The creamy coolness balances warm, cakey textures in the most satisfying way.
Creative Ways to Present
For a fun twist, serve your ice cream in waffle cones, cookie cups, or glass parfait dishes layered with crumbled cookies and fresh fruit. Presentation can turn your homemade treat into a celebration-worthy dessert that impresses family and friends.
Make Ahead and Storage
Storing Leftovers
Store any leftover ice cream in an airtight container to prevent freezer burn and maintain smooth texture. Press a piece of parchment paper or plastic wrap directly on the surface before sealing the lid to keep ice crystals away.
Freezing
This Homemade Vanilla Ice Cream Recipe freezes well for up to two weeks. After this period, while safe to eat, the texture can start to degrade and may become icy or grainy. Always ensure it’s tightly covered and kept at a consistent freezer temperature for best results.
Reheating
Ice cream isn’t reheated, but if it becomes too firm in the freezer, simply let it sit at room temperature for about 5-10 minutes before scooping. This brief softening time brings out the best scoopable consistency.
FAQs
Can I make this ice cream without an ice cream maker?
While this recipe is designed for an ice cream maker, you can still enjoy it by placing the mixture in a shallow container and stirring every 30 minutes while freezing to break up ice crystals. It won’t be quite as smooth but still deliciously homemade.
How long should I chill the mixture before churning?
Chilling for at least 2 hours is necessary, but overnight chilling allows the flavors to develop fully and results in creamier ice cream.
Can I substitute the vanilla extract with vanilla bean?
Absolutely! Scraping the seeds from a vanilla bean pod adds a more intense vanilla flavor and those little black specks that make your ice cream look spectacular.
Is this recipe suitable for vegetarians?
Yes, this recipe is completely vegetarian-friendly as it contains no animal-derived gelatin or other non-vegetarian additives.
Can I add mix-ins like nuts or chocolate chips?
Yes, add your favorite mix-ins during the last five minutes of churning to distribute them evenly and maintain their texture.
Final Thoughts
I truly hope you give this Homemade Vanilla Ice Cream Recipe a whirl because nothing beats the joy of scooping your very own creamy, flavorful vanilla ice cream at home. It’s surprisingly simple yet incredibly rewarding, and each spoonful feels like a personal celebration. So grab those ingredients, fire up your ice cream maker, and treat yourself to that classic dessert made with love and just a handful of essentials.
Print
Homemade Vanilla Ice Cream Recipe
- Prep Time: 10 minutes
- Cook Time: 0 minutes
- Total Time: 2 hours 30 minutes
- Yield: 6 servings
- Category: Dessert
- Method: No-Cook
- Cuisine: American
- Diet: Vegetarian
Description
This classic homemade vanilla ice cream recipe is creamy, smooth, and easy to make with just a few simple ingredients. Perfect for a refreshing dessert, it uses an ice cream maker to achieve the ideal soft-serve texture before firming up in the freezer.
Ingredients
Ice Cream Base
- 2 cups heavy cream
- 1 cup whole milk
- ¾ cup granulated sugar
- 1 tablespoon pure vanilla extract
- Pinch of salt
Instructions
- Prepare the mixture: In a large mixing bowl, whisk together the sugar, milk, and salt until the sugar is completely dissolved. Then stir in the heavy cream and vanilla extract to combine all ingredients thoroughly.
- Chill the base: Cover the mixture and place it in the refrigerator for at least 2 hours, or ideally overnight, to develop full flavor and ensure it is thoroughly chilled before churning.
- Churn the ice cream: Pour the chilled mixture into your ice cream maker and churn according to the manufacturer’s instructions, usually about 20 to 25 minutes, until the mixture reaches a soft-serve consistency.
- Freeze until firm: Transfer the churned ice cream into an airtight container and freeze for 2 to 4 hours to allow it to harden to a scoopable texture.
- Serve and enjoy: Scoop the ice cream into bowls or cones and serve as desired. Optionally, add toppings or mix-ins during the last 5 minutes of churning for extra flavor and texture.
Notes
- For added texture and flavor, add mix-ins such as chocolate chips, fruit, or cookie pieces during the last 5 minutes of churning.
- You can customize the base by adding cocoa powder, coffee, or fruit puree before chilling to create different ice cream flavors.
- Ensure the ice cream maker bowl is fully frozen before use for best results.
- Use an airtight container to prevent freezer burn and maintain ice cream quality.


