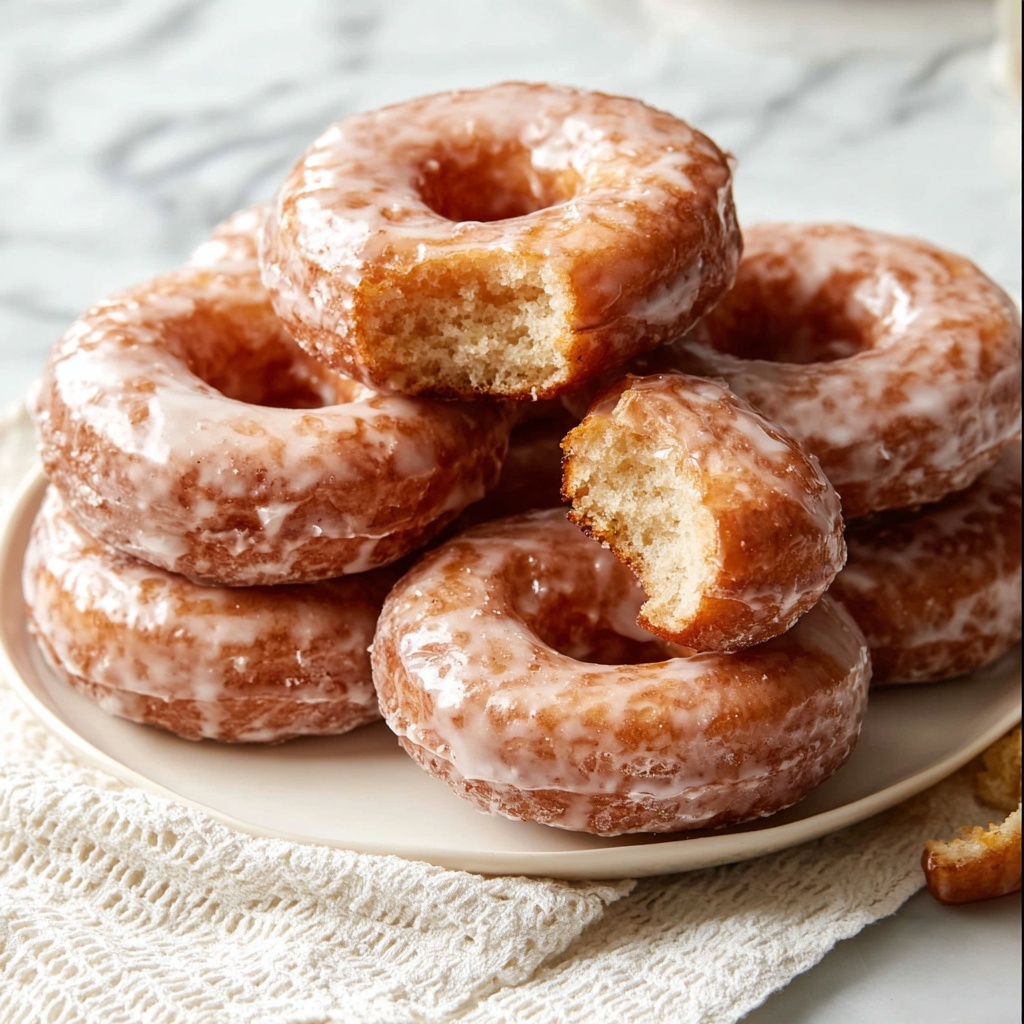
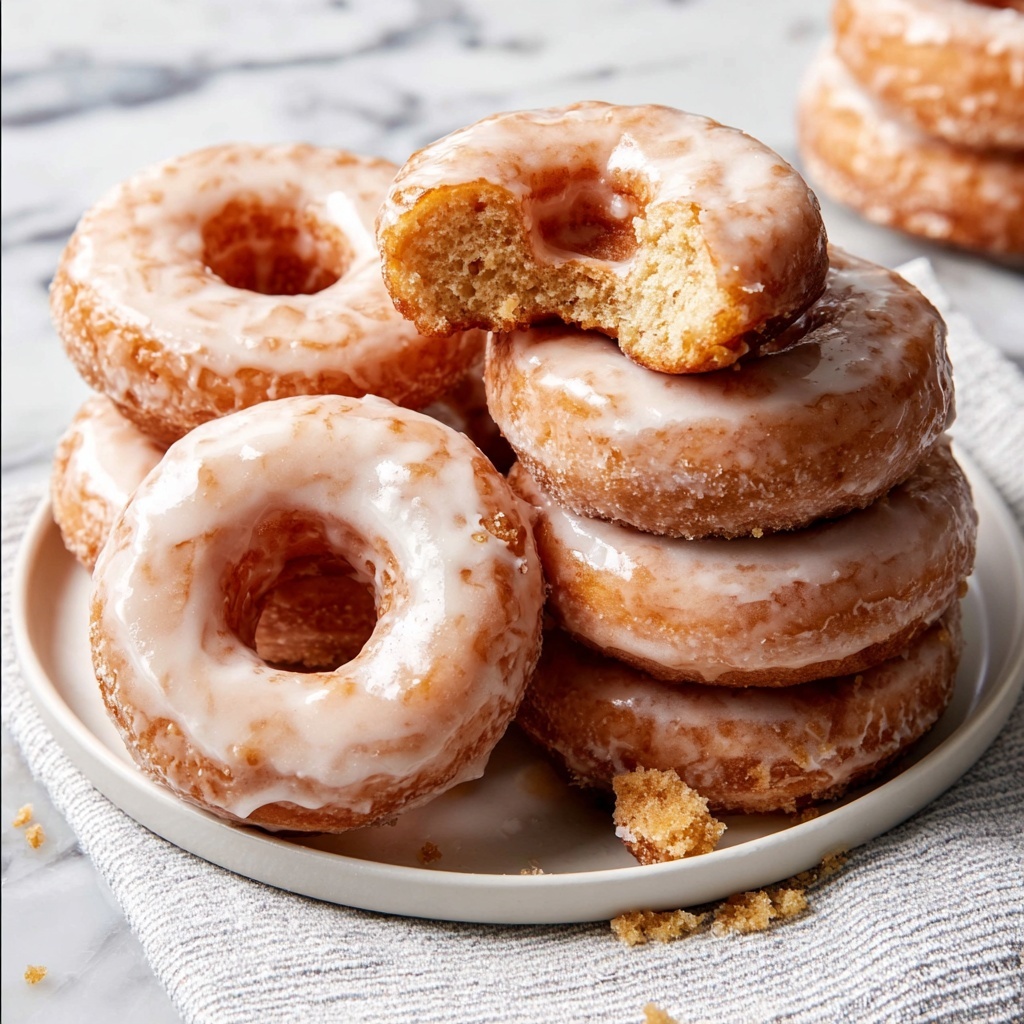
If you’ve ever dreamed of biting into a perfectly soft and fluffy doughnut coated with a shiny, sweet glaze, you’re going to adore this Homemade Glazed Doughnuts Recipe. It captures the magic of classic doughnuts you find in your favorite shops but made with love and fresh ingredients right in your own kitchen. The process might take a couple of hours, but don’t let that fool you — each step is so rewarding, and the end result is a batch of doughnuts that are tender, airy, and covered in a glaze that’s just the right balance of sweet and creamy. Trust me, once you try this Homemade Glazed Doughnuts Recipe, store-bought treats will feel like a distant memory.

Ingredients You’ll Need
Every ingredient in this Homemade Glazed Doughnuts Recipe plays a crucial role. We’re talking simple, everyday pantry staples that come together to create doughnuts with tender crumb, perfect rise, and that iconic golden color topped with the most irresistible glaze.
- Whole milk, warmed to about 110°F (43°C): Activates the yeast and adds moisture for soft dough.
- Instant or active dry yeast: The miracle worker that makes the dough rise and become delightfully fluffy.
- Granulated sugar: Sweetens the dough and feeds the yeast for a proper rise.
- Large eggs: Add richness, tenderness, and help bind ingredients.
- Unsalted butter, melted: Adds moisture and a tender crumb.
- Pure vanilla extract: Brings warmth and depth of flavor.
- Ground nutmeg: Delivers a subtle, fragrant hint that elevates the doughnuts.
- Salt: Balances sweetness and enhances flavor.
- All-purpose flour: The base that forms the dough’s structure.
- Vegetable oil: For frying — neutral in flavor and perfect for achieving that crisp golden exterior.
- Confectioners’ sugar: Key for the shiny sweet glaze.
- Heavy cream, half-and-half, or whole milk: Used in the glaze for creamy smoothness.
How to Make Homemade Glazed Doughnuts Recipe
Step 1: Prepare the Yeast Mixture
Begin by whisking together the warm milk, yeast, and a tablespoon of sugar in a large mixing bowl or the bowl of your stand mixer. Cover the mixture loosely and let it sit for 5 to 10 minutes. This step wakes up the yeast, creating a bubbly, foamy surface that promises a light and airy dough.
Step 2: Combine Initial Ingredients
Add the remaining sugar, eggs, melted butter, vanilla extract, nutmeg, salt, and half of the flour to the yeast mixture. Use a low speed to beat them together for about a minute, scraping the bowl’s sides as needed. This gentle mixing ensures everything starts melding without toughening the dough.
Step 3: Incorporate Remaining Flour and Form Dough
Next, add the rest of the flour and beat at a medium speed until the dough begins to pull away from the bowl’s sides, about two minutes. Keep a close eye here because the dough should still be slightly sticky — this will help keep the doughnuts soft and tender once cooked.
Step 4: Knead the Dough
You can continue kneading the dough in your stand mixer for another 5 to 7 minutes or turn it out onto a lightly floured surface and knead by hand for the same amount of time. This step develops gluten, giving the dough strength while keeping it soft. It’s a lovely tactile moment — the dough will transition from sticky and shaggy to smooth and elastic. The “windowpane test” is a great way to check your progress, stretching a small piece of dough to see if light passes through without tearing.
Step 5: Let the Dough Rise
Lightly grease a large bowl and place your dough inside, turning it to coat with oil. Cover and let it rise in a warm place for 1.5 to 2 hours or until it doubles in size. This is the magic rest that creates the fluffy texture you’ll adore.
Step 6: Shape the Doughnuts
After the dough has risen, punch it down gently to release air bubbles, then roll it out on a lightly floured surface until about 1/2 inch thick. Use a 3 to 3.5-inch doughnut cutter to cut your shapes — or get creative with cookie cutters if you don’t have a doughnut cutter on hand. Place the cut doughnuts onto parchment-lined sheets and let them rest for another 30 minutes, so they puff up beautifully as you heat your oil.
Step 7: Fry the Doughnuts
In a heavy-duty pot with an oil thermometer, heat your vegetable oil to 375°F (191°C). Carefully fry 2 to 3 doughnuts at a time for about 1 minute per side until perfectly golden. This stage fills your kitchen with that comforting aroma that’s impossible to resist. Once fried, transfer them to a cooling rack set over a baking sheet to drain excess oil.
Step 8: Make and Apply the Glaze
Whisk together the confectioners’ sugar, cream or milk, and vanilla extract to create a smooth glaze. While the doughnuts are still warm, dip them into the glaze, coating both sides. Place them back on the rack so any excess glaze can drip off and set into a shiny, sweet coat over about 20 minutes. This final touch is what transforms the doughnuts into the irresistible treats we all crave.
How to Serve Homemade Glazed Doughnuts Recipe
Garnishes
While the classic glaze shines on its own, you can sprinkle colorful sugar crystals, finely chopped nuts, or even a dusting of cinnamon to add personality. Fresh berries or a pinch of sea salt can also create a delightful contrast that enhances the sweetness.
Side Dishes
Pair your doughnuts with a refreshing cup of coffee or tea, or perhaps a tall glass of cold milk for a classic combo. Fresh fruit or yogurt on the side makes for a balanced breakfast or snack that feels both indulgent and satisfying.
Creative Ways to Present
Arrange doughnuts in a beautiful box or on a cake stand for special occasions. You can even sandwich them with flavored creams or spreads to turn these treats into mini doughnut burgers — a fun way to impress friends or family during brunch or celebrations.
Make Ahead and Storage
Storing Leftovers
If you happen to have any leftovers (though rare!), store your homemade glazed doughnuts in an airtight container at room temperature for up to two days to keep them soft and fresh.
Freezing
You can freeze doughnuts by wrapping each individually in plastic wrap and placing them in a freezer-safe bag for up to two months. Thaw overnight at room temperature for a quick treat any day.
Reheating
To enjoy doughnuts as if freshly made, warm them briefly in the microwave for about 10-15 seconds or pop them in a low oven for a few minutes. The glaze remains luscious and the dough regains its tender texture.
FAQs
Can I use active dry yeast instead of instant yeast?
Absolutely! This Homemade Glazed Doughnuts Recipe works well with either. Just be sure to activate the active dry yeast in warm milk before mixing as directed, and your dough will rise beautifully.
What if I don’t have a doughnut cutter?
No worries! You can use two round cookie cutters — a larger one for the doughnut and a smaller one for the hole. If you don’t have cookie cutters, even drinking glasses or jars work in a pinch.
Can I make these doughnuts gluten-free?
Since the dough relies heavily on gluten for structure and elasticity, this recipe is best suited for all-purpose flour. However, experimenting with a gluten-free blend designed for baking may work if you add appropriate binding agents.
How do I know when the oil is at the right temperature?
A kitchen thermometer is the best way to ensure the oil reaches the recommended 375°F (191°C). If the oil is too cool, the doughnuts absorb more oil and become greasy; too hot, and they can burn on the outside but remain undercooked inside.
Is it okay to eat doughnuts the next day?
Yes! Fresh is always best, but properly stored doughnuts remain delicious the next day or even the day after. Just refresh them with a brief warming to bring back that soft, fresh-from-the-fryer feel.
Final Thoughts
Making this Homemade Glazed Doughnuts Recipe truly feels like giving yourself a gift — the satisfaction of crafting something from scratch that’s soft, flavorful, and covered in a dreamy glaze is unbeatable. Whether you’re treating yourself on a weekend morning or sharing with loved ones, these doughnuts will bring smiles and warm hearts. So roll up your sleeves and dive in; the perfect doughnut experience is just a few ingredients and steps away!
Print
Homemade Glazed Doughnuts Recipe
- Prep Time: 30 minutes
- Cook Time: 1 hour 30 minutes
- Total Time: 2 hours
- Yield: 12 doughnuts
- Category: Dessert
- Method: Frying
- Cuisine: American
Description
These homemade glazed doughnuts are soft, fluffy, and perfectly sweet with a classic vanilla glaze. Made from scratch using warm milk, yeast, and simple pantry ingredients, they are fried to golden perfection and coated in a luscious glaze, making them an irresistible treat to enjoy fresh at home.
Ingredients
Dough:
- 1 cup (240ml) whole milk, warmed to about 110°F (43°C)
- 2 1/4 teaspoons (7g) instant or active dry yeast (1 standard packet)
- 1/3 cup (65g) granulated sugar, divided
- 2 large eggs
- 6 Tablespoons (85g) unsalted butter, melted and slightly cooled
- 1 teaspoon pure vanilla extract
- 1/4 teaspoon ground nutmeg
- 1/2 teaspoon salt
- 4 cups (500g) all-purpose flour (spooned & leveled), plus more as needed
- 1–2 quarts vegetable oil (for frying)
Glaze:
- 2 cups (240g) confectioners’ sugar, sifted
- 1/3 cup (80ml) heavy cream, half-and-half, or whole milk
- 1/2 teaspoon pure vanilla extract
Instructions
- Prepare the dough: Whisk the warm milk, yeast, and 1 tablespoon of sugar together in the bowl of a stand mixer. Cover loosely and let sit for 5–10 minutes until foamy and frothy on top. If no stand mixer is available, use a large bowl and mix by hand with a wooden spoon or silicone spatula.
- Mix the dough: Add the remaining sugar, eggs, melted butter, vanilla, nutmeg, salt, and 2 cups of flour to the yeast mixture. Beat on low speed for 1 minute, scraping down the bowl as needed. Add remaining flour and beat on medium speed until the dough pulls away from the bowl sides, about 2 minutes. Add additional flour gradually if dough is too sticky, aiming for a slightly sticky consistency.
- Knead the dough: Continue kneading with the mixer on medium speed for 5–7 minutes, or knead by hand on a lightly floured surface for the same duration. If sticky, lightly dust with small amounts of flour. The dough should be soft and elastic, passing the windowpane test.
- Let dough rise: Lightly grease a large bowl and place the dough inside, turning to coat in oil. Cover and let rise in a warm spot for 1.5–2 hours until doubled in size.
- Shape the doughnuts: Punch down the dough and roll it out on a lightly floured surface to 1/2 inch thickness. Cut doughnuts using a 3–3.5 inch doughnut cutter or two circle cookie cutters (large and small). Place doughnuts and holes on parchment-lined baking sheets and cover loosely. Let rest for 30 minutes to rise slightly.
- Heat the oil: Pour vegetable oil into a heavy-duty pot fitted with an oil thermometer and heat to 375°F (191°C) over medium heat.
- Fry the doughnuts: Fry 2–3 doughnuts at a time, cooking each side for 1 minute until golden brown. Remove with a slotted spoon and place on a wire rack set over a baking sheet. Adjust the heat to maintain 375°F. Repeat with remaining doughnuts. Turn off the heat when done.
- Make the glaze: Whisk confectioners’ sugar, heavy cream, and vanilla extract until smooth.
- Glaze the doughnuts: Dip warm doughnuts immediately into the glaze, coating both sides. Place back on the rack and allow excess glaze to drip. Let the glaze set for about 20 minutes.
- Serve and store: Enjoy doughnuts the same day for best texture and flavor. Store leftovers in an airtight container at room temperature or refrigerated for up to 2 days.
Notes
- Use a stand mixer if possible for easier dough mixing and kneading, but kneading by hand is effective too.
- Maintain oil temperature carefully while frying to ensure even cooking and prevent greasy doughnuts.
- If you don’t have a doughnut cutter, use two round cookie cutters to form the doughnut shape.
- Doughnuts are best enjoyed the same day but can be stored for up to two days without significant loss in quality.
- Wear kitchen gloves during frying to protect from hot oil splashes.


