
“`html
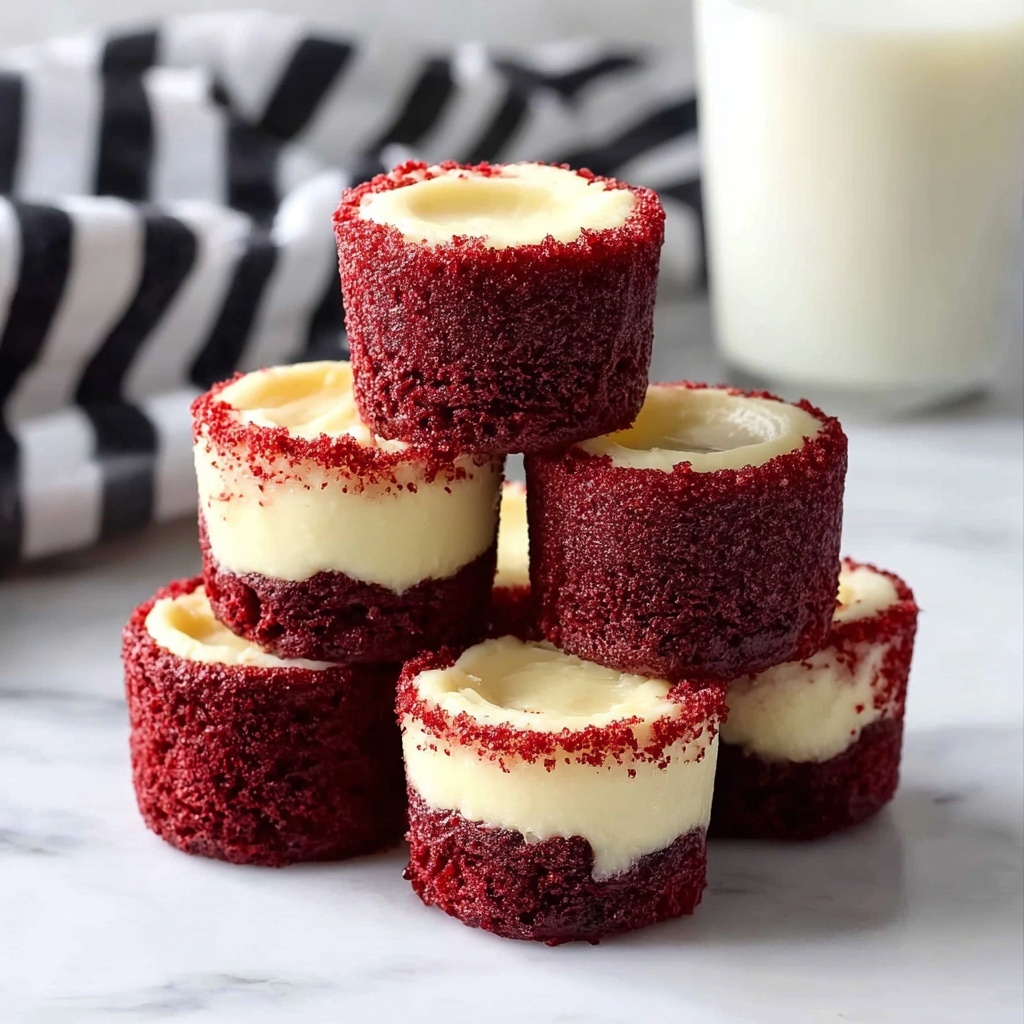
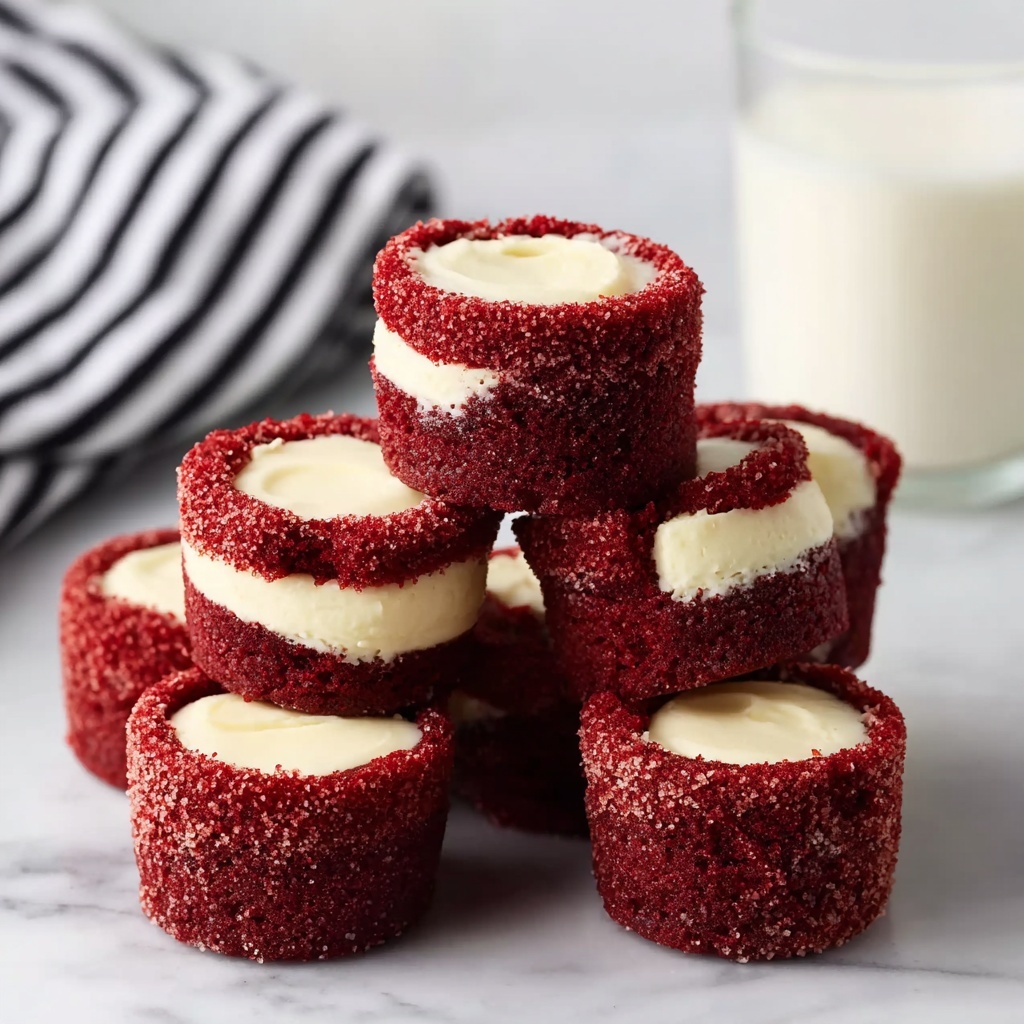
If you’ve ever dreamed of combining the luscious creaminess of cheesecake with the vibrant, rich flavor of red velvet cake, then you’re in for a real treat with this Red Velvet Cheesecake Bites Recipe. These delightful little morsels are perfect for parties, casual get-togethers, or simply a scrumptious anytime indulgence. Each bite bursts with velvety cocoa and bright red color, perfectly balanced by a smooth, tangy cream cheese center that will have everyone coming back for more. Trust me, once you try these Red Velvet Cheesecake Bites, they will quickly become one of your favorite go-to desserts!
Ingredients You’ll Need
Getting the ingredients right is key to achieving that perfect balance of flavor, texture, and eye-catching color in your Red Velvet Cheesecake Bites Recipe. Each component plays an essential role, from the cocoa powder that lends depth to the red velvet base to the cream cheese that creates that signature silky filling.
- All-purpose flour: The foundation that gives your bites structure but keeps them tender and moist.
- Unsweetened cocoa powder: Adds a subtle chocolate note that makes red velvet so special without overpowering.
- Salted sweet cream butter: Melted and cooled, it brings richness and moisture while enhancing flavor.
- Granulated sugar: Sweetens both the cake base and cheesecake filling, ensuring every bite delights.
- Red gel food color: Provides that unmistakable, vibrant red shade classic to red velvet.
- Pure vanilla extract: A splash in both batter and filling that boosts overall depth and aroma.
- Large eggs: Bind ingredients together and help create a delicate crumb and smooth filling.
- Cream cheese: Softened for mixing, it’s the creamy heart of these bites, lending tangy richness.
How to Make Red Velvet Cheesecake Bites Recipe
Step 1: Prepare Your Tools and Ingredients
First, preheat your oven to 350°F to get it nicely warmed up, and generously spray a mini muffin pan with nonstick cooking spray so your cheesecake bites pop out effortlessly once baked. Having everything ready helps the process flow smoothly.
Step 2: Create the Red Velvet Base
In a small bowl, whisk together the flour and cocoa powder; these dry ingredients give depth and texture to your base. Then, in a separate medium bowl, combine the melted butter, sugar, red gel food color, vanilla, and beaten eggs. Stir the flour mixture into the wet ingredients just until combined, making sure not to overmix. This creates a luscious, tender red velvet batter that’s the perfect canvas for your cheesecake centers.
Step 3: Make the Cream Cheese Filling
Now for the indulgent part: beat the softened cream cheese with sugar and vanilla until smooth and creamy. Add the egg yolk and mix gently until you achieve a silky texture. This filling will provide a delicate, tangy contrast to the sweet and chocolatey red velvet bite, making each piece burst with flavor.
Step 4: Assemble Your Bites
Using a piping bag or a spoon, place about 1 tablespoon of the red velvet batter into each mini muffin cup. Then carefully pipe or spoon 2 teaspoons of the cream cheese filling right into the center of each red velvet dollop. This layering creates the signature swirl and balance that makes these bites so irresistible.
Step 5: Bake and Cool
Bake your cheesecake bites for 8 to 9 minutes, just until the edges are set and the centers are still creamy. After baking, allow them to cool in the pan for 20 to 30 minutes before gently removing and transferring to a wire rack. Cooling completely ensures that each bite holds its shape while remaining moist and decadent.
How to Serve Red Velvet Cheesecake Bites Recipe
Garnishes
To elevate your Red Velvet Cheesecake Bites Recipe for guests or special occasions, consider garnishing with a light dusting of powdered sugar or a few mini white chocolate chips. Fresh berries, like raspberries or strawberries, add a lovely pop of color and a burst of freshness that complements the richness perfectly.
Side Dishes
Serve these bites alongside a cup of richly brewed coffee, a glass of cold milk, or even your favorite flavored tea. The cream cheese filling pairs beautifully with warm drinks, balancing sweetness with a comforting edge that makes snack time feel luxurious.
Creative Ways to Present
Want to get fancy? Arrange your Red Velvet Cheesecake Bites on a tiered dessert tray with edible flowers for a charming party centerpiece. You might also skewer them with festive picks for an easy-to-eat treat, or present them in small decorative cupcake liners to make each bite feel special and Instagram-worthy.
Make Ahead and Storage
Storing Leftovers
Leftover Red Velvet Cheesecake Bites can be stored in an airtight container in the refrigerator for up to 4 days. This keeps them fresh and maintains the delightful cream cheese texture without drying out the red velvet base.
Freezing
If you want to prepare these bites ahead of time, they freeze beautifully. Place them in a single layer on a baking sheet to flash freeze, then transfer to a freezer-safe container or bag. They’ll keep for up to 2 months, ready to thaw overnight in the refrigerator before serving.
Reheating
For the best flavor and texture, enjoy Red Velvet Cheesecake Bites chilled or at room temperature. If you prefer them warm, gently heat individual bites in the microwave for 10 to 15 seconds. Avoid overheating to maintain their creamy center without melting completely.
FAQs
Can I use regular food coloring instead of gel food color?
You can substitute regular liquid food coloring, but gel food color is recommended because it provides a more vibrant hue without altering the batter’s consistency.
What if I don’t have a mini muffin pan?
A mini muffin pan is ideal for this recipe’s size, but you could use a standard muffin pan and adjust the baking time accordingly. Just be mindful that larger bites will take longer to bake and may need more filling.
Can I make these bites dairy-free?
Yes! Substitute dairy-free cream cheese and butter alternatives to make these bites suitable for lactose intolerance or vegan diets, but note that texture and taste might vary slightly.
How do I prevent the cheesecake filling from cracking?
Mix the cream cheese filling gently until smooth but avoid overbeating. Also, bake just until edges are set; the centers should be creamy to maintain that smooth texture.
Can these bites be frozen after baking or only before?
They can be frozen both before and after baking. For best results, freeze post-baking after they’ve cooled completely, then thaw before serving for the creamiest texture.
Final Thoughts
I truly believe the Red Velvet Cheesecake Bites Recipe is a game-changer in the world of desserts. Their perfect balance of smooth, tangy cheesecake and rich red velvet cake flavor always wins over friends and family. Whether you’re baking for a celebration or just because, these bites bring warmth, color, and joy to every bite. So go ahead, give this recipe a try—you’ll be amazed how something so simple can taste so wonderful!
“`
Print
Red Velvet Cheesecake Bites Recipe
- Prep Time: 15 minutes
- Cook Time: 9 minutes
- Total Time: 59 minutes
- Yield: 42 bites
- Category: Dessert
- Method: Baking
- Cuisine: American
Description
Delightful Red Velvet Cheesecake Bites combine the classic flavors of red velvet cake with a creamy cheesecake center. These mini treats are perfect for parties or any dessert craving, featuring a tender cocoa-rich base and smooth, sweet cheesecake filling baked to perfection.
Ingredients
Red Velvet Base
- 1 cup all-purpose flour
- ¼ cup + 1 tablespoon unsweetened cocoa powder
- ¾ cup salted sweet cream butter, melted and cooled
- 1¼ cups granulated sugar
- 1 tablespoon red gel food color
- 2 teaspoons pure vanilla extract
- 2 large eggs, room temperature and beaten
Cheesecake Filling
- 8 ounces cream cheese, softened
- ¼ cup granulated sugar
- 1 teaspoon pure vanilla extract
- 1 large egg yolk
Instructions
- Preheat Oven: Preheat the oven to 350°F (175°C). Spray a mini muffin pan with nonstick cooking spray and set aside for preparation.
- Prepare Dry Ingredients: In a small bowl, combine the all-purpose flour and unsweetened cocoa powder to create the dry base mixture.
- Mix Red Velvet Base: In a medium mixing bowl, whisk together the melted butter, 1¼ cups granulated sugar, red gel food color, vanilla extract, and beaten eggs. Slowly incorporate the dry flour and cocoa powder mixture, stirring gently until just combined to avoid overmixing.
- Prepare Cheesecake Filling: In a separate medium bowl, beat softened cream cheese with ¼ cup granulated sugar and vanilla extract until smooth and creamy. Add the egg yolk and continue mixing until all ingredients are well combined.
- Assemble Bites: Using a piping bag or spoon, pipe approximately 1 tablespoon of the red velvet base into each cavity of the mini muffin pan. Then, carefully pipe about 2 teaspoons of cheesecake filling into the center of each red velvet portion, creating a layered mini bite.
- Bake: Place the muffin pan in the preheated oven and bake for 8-9 minutes, just until the cheesecake filling is set and the red velvet base is cooked through. Avoid overbaking to keep the bites moist and tender.
- Cool: Remove the pan from the oven and let the cheesecake bites cool in the pan for 20-30 minutes. Then transfer them to a wire rack to cool completely before serving or storing.
Notes
- Ensure the cream cheese is softened for smooth filling without lumps.
- Room temperature eggs help to mix ingredients evenly and improve texture.
- Use red gel food coloring for vibrant color without thinning the batter.
- Mini muffin pans create perfectly bite-sized desserts; larger pans will require longer baking times.
- Cool completely before removing from pans to prevent breakage.
- Store leftovers in an airtight container in the refrigerator for up to 3 days.


