
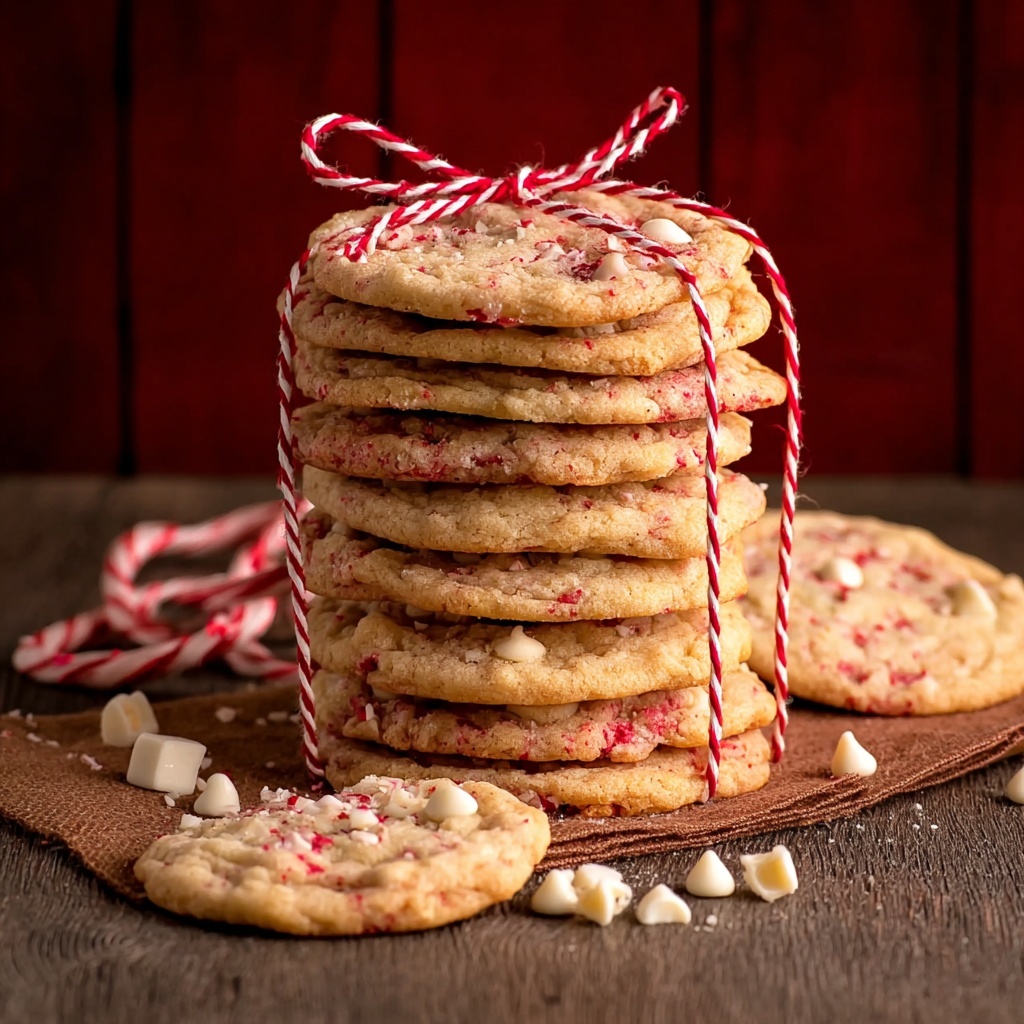
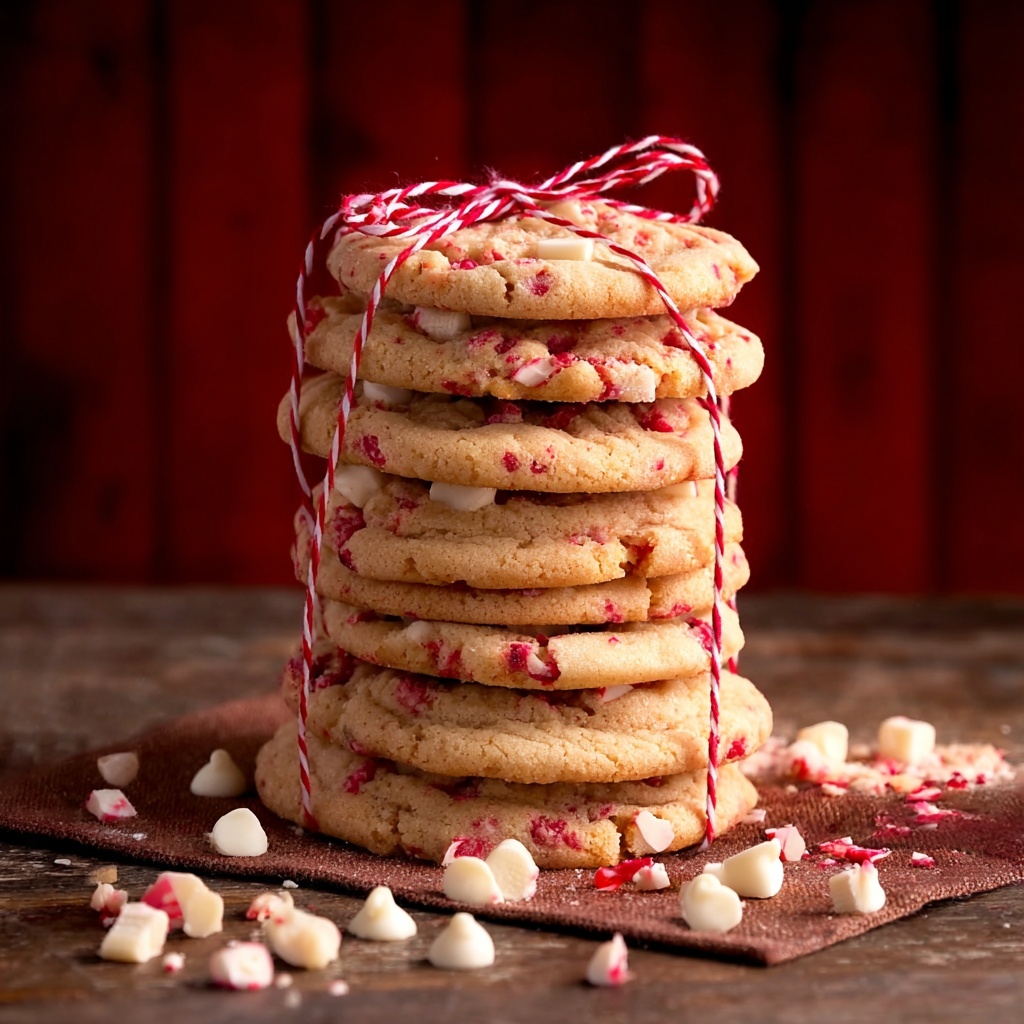
If you’re looking for a festive treat that’s as delightful to make as it is to eat, this White Chocolate Candy Cane Cookies Recipe is an absolute must-try. Imagine soft, chewy cookies bursting with sweet white chocolate chips and the refreshing crunch of crushed candy canes—each bite is a perfect balance of creamy and minty magic. These cookies strike that wonderful holiday chord that makes them a favorite for any gathering or cozy night in, and I can’t wait to share how simple and fun it is to bring this recipe to life in your own kitchen.
Ingredients You’ll Need
The beauty of this White Chocolate Candy Cane Cookies Recipe lies in its straightforward ingredients that combine to deliver incredible flavor and just the right texture. Each ingredient has a special role, whether it’s the fluffy butter for richness or the candy canes adding that unmistakable peppermint spark.
- 1 1/4 cup all-purpose flour: The foundation that gives your cookies structure and that wonderfully tender crumb.
- 1/2 tsp sea salt: Just a pinch to enhance sweetness and round out the flavors perfectly.
- 1/4 tsp baking soda: Helps your cookies rise slightly so they stay soft but not flat.
- 1/2 cup unsalted butter (room temperature): Adds creaminess and richness while ensuring the perfect chewy texture.
- 1/2 cup light brown sugar (packed): Brings warmth and slight caramel notes that deepen the flavor.
- 1/4 cup granulated sugar: Balances the softness with a hint of crispness on the edges.
- 1 large egg (room temperature): Binds everything together and keeps the dough smooth.
- 1 tsp vanilla extract: Infuses subtle sweetness and depth into every bite.
- 1 cup white chocolate chips: Melts into pockets of gooey, creamy delight throughout the cookie.
- 1/2 cup crushed candy canes: Adds refreshing peppermint crunch and festive color.
How to Make White Chocolate Candy Cane Cookies Recipe
Step 1: Preheat and Prepare
Start by heating your oven to 350°F and lining your baking sheets with parchment paper or silicone baking mats. This prevents sticking and helps your cookies bake evenly with perfectly crisp bottoms.
Step 2: Mix Dry Ingredients
In a small bowl, whisk together the all-purpose flour, baking soda, and sea salt. Setting this mixture aside means you’ll add it later without overmixing the dough, which keeps your cookies tender.
Step 3: Cream Butter and Sugars
Using an electric mixer, beat the unsalted butter, light brown sugar, and granulated sugar together for about 3 minutes until the mix turns pale, fluffy, and full of air. This process is key to creating that soft texture you crave.
Step 4: Add Egg and Vanilla
Mix in the egg until it’s fully combined, and then add the vanilla extract. These ingredients bring moisture and a warm aroma that make the dough smell irresistible.
Step 5: Combine Wet and Dry
Turn your mixer speed to low and add the flour mixture, mixing just until everything comes together. Overmixing here can result in tougher cookies, so be gentle.
Step 6: Fold in Candy Canes and Chocolate
Stir in the crushed candy canes and white chocolate chips evenly throughout the dough. This is where the magic really begins—those little bursts of mint and creamy chocolate make these cookies truly stand out.
Step 7: Scoop and Shape
Using a medium cookie scoop (about 1 1/2 tablespoons), portion your dough onto the prepared baking sheets. Lightly flour your hands and roll each portion into a neat ball to encourage even baking and beautiful shape.
Step 8: Chill the Dough
Pop your cookie dough balls in the fridge for at least one hour. This step is crucial to let the flavors meld and to prevent spreading during baking, so the cookies hold their lovely shape.
Step 9: Bake and Cool
Bake the cookies for 10-12 minutes until you see golden-brown edges forming. They will still look a bit soft but will firm up as they cool. Let them rest on the baking sheets until completely cool for the best texture.
How to Serve White Chocolate Candy Cane Cookies Recipe
Garnishes
Sprinkle a tiny pinch of extra crushed candy cane on top right after baking while the cookies are still warm for an eye-catching sparkle and a little extra minty punch.
Side Dishes
These cookies pair beautifully with a glass of cold milk or a steaming cup of hot cocoa. The creamy white chocolate and peppermint flavors complement creamy drinks perfectly, creating a cozy and indulgent snack moment.
Creative Ways to Present
Arrange your White Chocolate Candy Cane Cookies Recipe on a festive platter lined with fresh evergreen sprigs or red and white striped paper for a holiday vibe. Or package them in a clear cellophane bag tied with a red ribbon—perfect for gifting to friends and family!
Make Ahead and Storage
Storing Leftovers
Store your cookies in an airtight container at room temperature for up to five days. Layer them carefully with parchment paper to prevent sticking and maintain their texture and flavor.
Freezing
If you want to keep these delightful cookies longer, freeze the baked cookies in a sealed container or freezer bag for up to three months. When you’re ready, just thaw them at room temperature for a few hours before enjoying.
Reheating
To refresh your cookies and bring back that just-baked softness, warm them in the microwave for about 10-15 seconds or in a low oven for five minutes. This step brings back their melty white chocolate goodness!
FAQs
Can I substitute regular chocolate chips for white chocolate?
Absolutely! While white chocolate is part of what makes this White Chocolate Candy Cane Cookies Recipe special, using regular or semi-sweet chocolate chips will give a delicious twist. Just remember it will alter the flavor profile slightly.
What can I use instead of candy canes?
If peppermint candy canes are hard to find, you can substitute with peppermint extract for flavor and crushed peppermint candies or even peppermint bark for texture and festivity.
How do I make these cookies vegan?
To make this recipe vegan, replace the butter with a plant-based alternative, use a flax egg or chia egg substitute, and swap white chocolate chips for vegan white chocolate chips. The peppermint candy should be checked for any animal-derived ingredients as well.
Why should I chill the dough before baking?
Chilling the dough prevents cookies from spreading too much when baked. It solidifies the fats and helps the cookies retain their shape, making them thicker and chewier, which is perfect for this recipe.
Can I make the dough ahead and bake later?
Yes! You can prepare the dough, shape it into balls, and keep them refrigerated for up to 24 hours before baking. This actually enhances the flavor and texture, making your baked cookies taste even better.
Final Thoughts
Making this White Chocolate Candy Cane Cookies Recipe is like bringing a little holiday magic into your kitchen, no matter the season. I love how the playful crunch of candy canes combines with silky white chocolate for a cookie that’s both festive and utterly comforting. Whether you bake a batch for friends, family, or just for yourself as a special treat, these cookies are guaranteed to spread joy with every bite—so don’t wait, get baking!
Print
White Chocolate Candy Cane Cookies Recipe
- Prep Time: 15 minutes
- Cook Time: 12 minutes
- Total Time: 1 hour 30 minutes
- Yield: 20 servings
- Category: Dessert
- Method: Baking
- Cuisine: American
Description
Delight in these festive White Chocolate Candy Cane Cookies, combining the sweetness of white chocolate with the refreshing crunch of crushed candy canes. Perfect for holiday gatherings, these cookies offer a soft, chewy texture with a hint of peppermint, making them a seasonal favorite that’s easy to prepare and sure to impress.
Ingredients
Dry Ingredients
- 1 1/4 cup all-purpose flour
- 1/2 tsp sea salt
- 1/4 tsp baking soda
Wet Ingredients
- 1/2 cup unsalted butter (room temperature)
- 1/2 cup light brown sugar (packed)
- 1/4 cup granulated sugar
- 1 large egg (room temperature)
- 1 tsp vanilla extract
Mix-ins
- 1 cup white chocolate chips
- 1/2 cup crushed candy canes
Instructions
- Preheat Oven: Set your oven to 350°F (175°C) and prepare baking sheets by lining them with parchment paper or silicone baking mats to prevent sticking.
- Combine Dry Ingredients: In a small bowl, mix together the all-purpose flour, sea salt, and baking soda thoroughly. Set this mixture aside for later use.
- Cream Butter and Sugars: Using an electric mixer, beat the room temperature unsalted butter with the light brown sugar and granulated sugar until the mixture is pale in color and fluffy in texture, about 3 minutes. This creates a light base for your cookies.
- Add Egg and Vanilla: Incorporate the large egg into the butter-sugar mixture, mixing until fully combined. Follow by adding the vanilla extract and mix just until they are blended together.
- Mix in Dry Ingredients: Lower the mixer speed to low and gradually add the flour mixture to the wet ingredients. Mix just until everything comes together, being careful not to overmix which could toughen the cookies.
- Add Candy Canes and White Chocolate: Gently fold in the crushed candy canes and white chocolate chips until they are evenly distributed throughout the dough.
- Form Cookie Balls: Using a medium cookie scoop (about 1 1/2 tablespoons), portion the dough onto the prepared baking sheets. Lightly flour your hands and roll each scoop into a smooth ball to ensure even baking.
- Chill Dough: Place the baking sheets with cookie dough balls in the refrigerator and chill for at least 1 hour. This helps the cookies maintain their shape and enhances flavor development.
- Bake Cookies: Bake the chilled cookie dough at 350°F for 10-12 minutes or until the edges turn a golden brown. Remove from oven and allow the cookies to cool completely on the baking sheets before serving.
Notes
- Chilling the dough is key to preventing the cookies from spreading too much during baking.
- Use room temperature butter and egg to ensure proper mixing and texture.
- For a stronger peppermint flavor, add a few drops of peppermint extract along with the vanilla.
- Store cookies in an airtight container at room temperature for up to one week.
- For extra crunch, sprinkle additional crushed candy canes on top of the dough balls before baking.


